I like the idea of refashioning an unattractive or ill-fitting article of clothing into something cute and wearable. Even better if you can make it look like an Anthropologie or J.Crew item at a fraction of the price. Trouble is, I lack the creativity and skills that are required to come up with something like that on my own. The bloggers out there who are churning out fantastic-looking items are nothing short of magicians, in my eyes.
When I saw this tutorial for turning an oversized t-shirt into yoga/lounge pants I knew I'd finally discovered a refashioning project I could take on. Not only did it look easy but it also wouldn't take long since I'd be able to re-use some of the seams and shape of the original t-shirt. The instructions are pretty clear and easy to follow despite being written in less than perfect English. For that reason, I've rewritten the tutorial below to help clarify things even though it's pretty intuitive once you get to arranging the cut pieces. I found I didn't have to follow the instructions once I got everything cut and laid out.

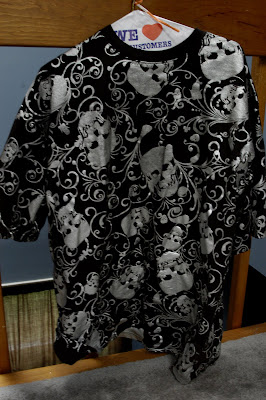
I found this garish t-shirt at an equally garish flea market. At $8 it was more than I meant to spend on this project but I couldn't resist the flashy skull print. While it's nothing I'd ever wear in public I could somehow see it working as lounge pants. And considering how much some of the skull lounge pants I currently own cost, $8 ain't a bad price. Of course, that last sentence reveals that I don't exactly need more skull-themed articles of clothing but who are you to judge? Some people collect Hummel figures; I collect clothing with skulls on it. To me the former is much more frightening.
You'll want to work with a shirt that's at least XL. Mine was men's XXL so I wound up having to take in some of the seams and trim excess fabric, but it was nice to have enough fabric on hand and not worry about having to patch in extra.
 1) Cut the sleeves off of an oversized t-shirt and set aside to use later.
2) Cut off the collar, cutting straight across the top of the t-shirt.

3) Cut all the way down the middle. Make sure it's even.

4) Unfold each piece and lay them flat, right sides together. Pin along "V" where sleeves used to be and sew.
 5) Open it up and arrange so it looks like inside out pants. Pin both long sides and sew. You may want to try on the pants first to make sure the fit is right. If they are too small you can add extra strips of fabric on each side.
  6) Take one sleeve and cut open along the short seam. Repeat for the other sleeve. Place right sides together and pin along short sides to create a band the same width as the waist of your pants. Trim the top so it's twice as tall as you want your waistband to be. Sew short sides together.
7) Turn pants right side out and waistband inside out. Pin together, right sides together, as shown. Sew along the top.

8) Turn pants inside out and fold the waistband down to create a casing for the drawstring. Tuck raw edge under and topstitch.
 9) Snip two small holes in the front of your pants big enough to thread your drawstring through. (Make sure to not cut through both layers.) Use a 1" wide strip of fabric, cord, or a ribbon as your drawstring. Thread through waistband using a safety pin and tie. Then you're all done!
 Thanks to tara m. for the helpful tutorial and photos. Click the link to see others' finished products as well.


5 comments:
ADORE THESE AS YOGA PANTS, well done! THANKS FOR LINKING TOO! have a great DAY! jenn
Those are so fun!!
Those are too awesome! I must try them even though I can't sew very well. The instructions make it look simple.
Donna :)
This is a truly great way to recycle (or upcycle as I like to call it.) I love it and would love to see you post this at my linky party Upcycled Awesome!
http://tinyurl.com/Upcycled9 and come back to my blog for Stashbusting-September. I promise it will be worth your while!
oh thanks for stopping by my yoga pants-your print is MUCH cooler!
Post a Comment