Saturday, January 29, 2011

A Photo A Day [Days 152 & 153]

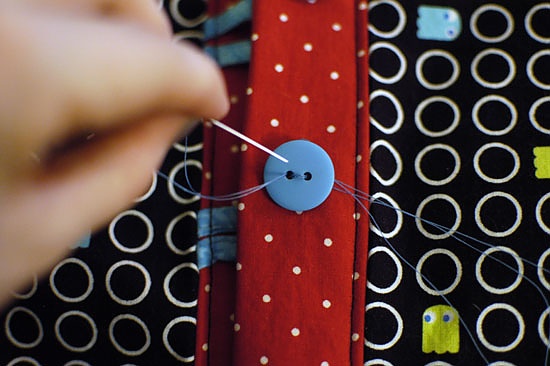
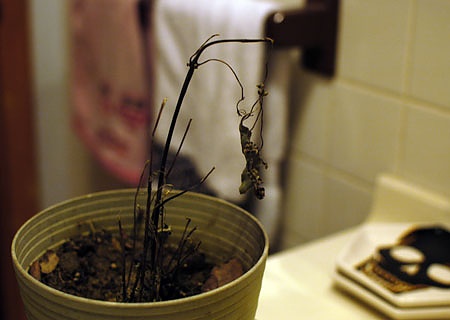
This week's theme is hope. For some this is the only source of hope in life.


Finally finished the sewing project I started last weekend. Here I am putting the finishing touches on it. I should have a full blog post about it up tomorrow.

Thursday, January 27, 2011

A Photo A Day [Days 150 & 151]

A random filler pic of my kitty, Punky:


This week's theme, which I've been avoiding for most of the week, is "hope." I woke up this morning hoping the sun that's peeking out would be enough to melt all of that evil snow away so I wouldn't have to shovel. Alas, it was not to be. Manual labor was all that would shift the snow.

Tuesday, January 25, 2011

A Photo A Day [Days 148 & 149]

This week's official theme is "hope." Here's what I think of that theme right about now:

Day 148


For today's photo I abandoned hope and sought out an alternate theme to guide me. This one fits the bill for The Daily Shoot's theme: "make a photograph today that illustrates attraction."

Day 149 - Like a moth to a flame


Monday, January 24, 2011

Thin Mint Cupcakes


While I'm sure Thin Mint cupcake recipes have been out there on the internet for years I'm going to pretend I'm clever in coming up with my own version. For that reason, I didn't even bother Googling the subject for fear that my own creativity would be tainted by others' ideas. So if this has already been done I apologize for the repeat recipe. If it hasn't you can applaud me for my genius. :)

Girl Scout Cookie season is in full swing and I am both blessed and cursed to have my very own troop leader/cookie pusher on staff at work. My co-worker nicely brings in cases of cookies on the very first day of the sale and keeps restocking her supply until the very last day. As a result, I've got brightly colored boxes of all of Thin Mints, Caramel deLites, and Tagalongs/Peanut Butter Patties tantalizing me from across the room. Since I bake so much I'm usually able to resist going hog wild but I will buy a box of each of my favorites. While I love the flavors I'm always disappointed by how artificial and preservative-laden they taste when compared to freshly baked goods. One box of each is usually enough to tide me over until the following year.

Oddly, while I like chocolate and mint I don't get as excited about Thin Mints as most cookie customers seem to be. If they sold smaller portions I'd be happy with half a sleeve and then calling it quits for the year. But find a way to add cake and frosting to the mix and I'm game. Inspired by my Oreo truffle cupcakes I got to brainstorming how to incorporate Thin Mints into a cupcake and came up with a decadent, Thin Mint-laden creation.

As with the Oreo cupcakes, I lined the bottom of each cupcake with a cookie and whipped up a cream cheese cookie filling, only instead of Oreos I used Thin Mints. Paired with moist chocolate cake and topped with a a dollop of melted Andes mints and mint buttercream frosting the experience is like eating an overgrown Thin Mint. Mmmmm! Fortunately, nutritional information is not available so you don't have to feel guilty when you eat more than the suggested portion size as I always do with Girl Scout Cookies. There isn't a thing I'd change about these cupcakes and I have a feeling I'll be tempted to make then again this time next year.


Thin Mint Filling
Recipe adapted from Inside BruCrew Life

26 Thin Mint cookies, finely crushed (I used a food processor)
4 1/2 ounces cream cheese, softened

Blend crushed Thin Mints and cream cheese until fully mixed. Shape into 1" balls, place on a baking sheet, and refrigerate while making the batter.

Chocolate Cupcakes
Recipe adapted from Family, Stamping and Food

24 Thin Mint Cookies
2 cups flour
1 cup cocoa powder
1 1/2 teaspoon baking powder
1 1/2 teaspoon baking soda
1/4 teaspoon salt
1 3/4 cups sugar
1/2 cup melted butter, cooled
2 eggs
1 cup milk
2 1/2 ounces Andes Creme de Menthe baking chips
1 tablespoon heavy cream

1) Preheat oven to 350 F. Line 24 cupcake wells with paper liners. Place a Thin Mint cookie in the bottom of each liner.
2) Combine flour, cocoa, baking powder, baking soda, and salt in a bowl. Set aside.
3) Beat sugar and melted butter together on medium speed until well combined.
4) Add eggs and beat to combine.
5) Beginning with the flour mixture, add flour and milk alternately with three additions of flour and two additions of milk, beginning and ending with flour. Beat until just combined.
6) Fill cupcake liners 1/3 full with batter. Place Thin Mint truffle in the center of each and top with more batter until 2/3 full. Bake in preheated oven for 19-26 minutes or until tops of cupcakes spring back when lightly touched.
7) Cool in pan on rack for ten minutes, then remove from pan and transfer to a wire rack to cool completely.
8) While cupcakes are still warm, melt Andes baking chips and heavy cream in a saucepan over low heat until smooth. Spread a thin layer of chocolate on top of each cupcake.

Mint Buttercream
12 tablespoons unsalted butter, at room temperature
3 cups powdered sugar
3 tablespoons heavy cream
1/4 teaspoon peppermint oil
Green food coloring (optional)

1) In a large mixing bowl, cream butter for 45-60 seconds.
2) Add powdered sugar and beat until the mixture comes together.
3) Scrape down the sides of the bowl and add heavy cream, peppermint oil, and food coloring (if desired). Beat until combined and then beat an additional 45 seconds. If necessary, add more powdered sugar for desired consistency.



Photobucket

Sunday, January 23, 2011

A Photo A Day [Days 145-147]

Busy day on Friday, so no chance to take a picture until bedtime. This is the last thing I see before I turn out the light at night.


Spent most of Saturday slaving away at the sewing machine.


Baked Thin Mint cupcakes today. Recipe coming soon.

Thursday, January 20, 2011

A Photo A Day [Days 143 & 144]

Got my new 35mm lens in the mail yesterday. The delivery guy nicely left my $200 lens sitting on the front porch in plain view. Good thing I've never had a problem with packages disappearing. Wish I could say the same about the adorable Union Jack valve stem covers I once had on the tires of my car, but I digress. I'm having fun playing around with the lens using my kitties as my test subjects. They're not always so cooperative but out of 20 shots this one turned out the best.


I love that with my new lens I can take pictures in low light, especially since I live like a vampire and my house is constantly shrouded in darkness. Took a series of pictures of our crackling fire hoping to catch the sparks shooting up into the air. Theme: Mid air.

Tuesday, January 18, 2011

Glazed Chai Cookie Bars


I needed something easy to whip up for my book club meeting so I thumbed through the bar/cookie recipes in my collection. This time of year there's nothing I like better than downing cups of tea throughout the day to keep warm, with one of my favorites being chai. The combination of spices is one of my favorites so why not bake them into a cookie bar topped with a sweet honey glaze?

My review of the finished product is that the flavors are subtle, the bars are nicely chewy, and while the honey in the glaze works well since tea + honey is always a win I can't help but wonder if a different topping might work better. I think I'm too spoiled by cake topped with frosting and had a hard time adjusting my palate. Still, these are tasty if you're looking for a buttery cookie treat.

Glazed Chai Cookie Bars
Recipe from Crepes of Wrath

1/2 cup granulated sugar
1/2 cup dark or light brown sugar
1 cup unsalted butter, room temperature
1 egg, room temperature
2 cups all-purpose flour
1/4 teaspoon kosher salt
1 1/4 teaspoons ground ginger
1 1/2 teaspoons ground cinnamon
3/4 teaspoon garam masala
3/4 teaspoon ground cloves
1/4 teaspoon ground black pepper
1/4 teaspoon ground allspice
1/4 teaspoon nutmeg
Glaze:
3 tablespoons honey
1 cup powdered sugar
2-4 tablespoons milk (start with 2 tablespoons, add more as needed)

1. Preheat your oven to 350 degrees F and grease and/or line a 9x13x2 pan. Beat together the sugars and butter until light and fluffy, 3-5 minutes. Beat in the egg and scrape down the sides of the bowl with a rubber spatula.

2. In a medium bowl, combine the flour, salt, ginger, cinnamon, garam masala, cloves, pepper, allspice, and nutmeg until blended. Add to butter mixture and beat gently until everything is thoroughly combined. Don’t over-mix, though. If everything isn’t quite coming together in your mixer, finish it up by hand.

3. The dough will be very similar to a cookie dough, so I found it easiest to press it into the prepared pan by hand. Don’t worry if it looks thin, it’ll puff up when baking. Bake at 350 degrees F for 22-25 minutes, until the dough no longer wiggles when gently shaken and the dough is a very light brown. Allow to cool completely before finishing up with the glaze.

4. To make the glaze, combine the three tablespoons of honey and powdered sugar, then beat together until combined. Add in the milk, 1 tablespoon at a time, until the icing is a consistency that you like. Pour the glaze over the bars and allow to set (this can be sped up by putting the bars in the fridge).


Photobucket