Monday, January 31, 2011

A Photo A Day [Day 155]


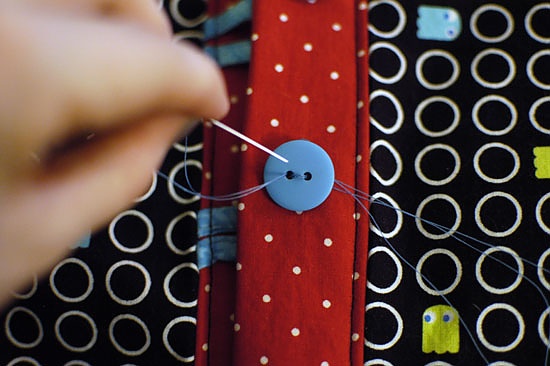
The Daily Shoot's theme: "Make a photograph that features repetition."

Sunday, January 30, 2011

Embossed Stamped Stationery


Believe it or not, there are a few sections of the craft store that hold little interest for me: the fake flowers, clay, unfinished wood, and, until today, the rubber stamps. The latter have always seemed a bit pricey to me and I couldn't think of anything worthwhile to do with them. I'm not sure this latest craft counts as worthwhile but it's something fun to do to fill a lazy Sunday evening.

A few days ago I spotted Food, Wine, & Mod Podge's tutorial for embossed stationery and was ready to rush out and buy all of the necessary supplies. But I was patient and made the rounds to all of the nearby craft shops so I could dutifully use my coupons and not pay full price for anything. JoAnn Fabric happened to have embossing powder on clearance, Michaels had nice notecard/envelope sets on sale and lots of ink to choose from, and AC Moore had the embossing heat tool at 40% off with a coupon. Despite my efforts, I invested close to $20 in this project even though I was able to use the stamps I already had on hand. I'd picked up the two skull stamps around Halloween and my wonderful uncle gave me the Edward Gorey ballerina stamp last year. I'm so glad I now have a perfect way to put them to use!

The tutorial is spot on so if you're interested in trying this for yourself I'd recommend following those instructions. The only notes I have are to be sure to clear all of the embossing powder off before applying heat. There are a few smudges and spots around my stamps where I accidentally left some. I read somewhere that you might need to use a small brush or toothpick to do the job so I'll give that a go next time. Also, the heating process took less time than I expected, just a few seconds over each spot. The glossiness showed up almost immediately so be sure you don't overdo it with the heat. Still, even with a few errors I'm happy with my custom stationery and can't wait to start sending out notes.

I'm afraid this means I have a new crafting obsession as I spent the better part of the evening browsing Etsy for cute little rubber stamps. Looks like there's also one more aisle of the craft store for me to check out, much to my husband's chagrin.


Photobucket

Pac-Man Baby-in-the-Hood Jacket


I have a habit of entering every single contest I come across, whether I want the prize or not. So when I got an email notifying me that I'd won a copy of Anna Maria Horner's Handmade Beginnings I wasn't exactly surprised that I'd won something so poorly suited for me. It's a book designed to prepare for the arrival of a baby and anyone who knows me is probably snickering already. Not only do I not have any kids but I also intend to keep my life child-free. No offense to those of you who want to reproduce but it's just not my thing. Still, the thrill of winning was enough and I did eagerly flip through the book when it arrived, making note of the few projects I could make even without a young 'un in residence. There's a bag that looks promising and a maternity shirt that, with enough alterations, could make for a cute summer top. Or a great top to hide my belly after a cupcake binge.

Then I realized that I have not one, not two, but three cousins all expecting babies this year. Good to know they're making up for my lack of cooperation in the baby producing arena and carrying on the family genes. I thought it might be nice to make them some handmade gifts and what better source for inspiration than the book I just happened to have tucked away in my craft desk? Going in chronological order by due date I picked which cousin I'd sew for first and I already had the perfect fabric on hand.

While I never make New Year's resolutions for various philosophical and psychological reasons, I did tentatively plan to try to use up as much of my overgrown fabric stash as possible this year without adding lots more. Yeah, that lasted about a week before I saw the Pac-Man and Space Invaders fabric at Fabric.com. I managed to stop myself from purchasing it for nearly another week. But then they put it on sale, I had a coupon for an additional 15% off, and the rest is history. What really gave me the excuse to buy it was knowing that it would be perfect for my cousin's baby, which doesn't explain why I bought two yards of the Pac-Man fabric and even more of the Space Invaders fabric. What can I say? I'm a weak woman.


The book is as beautiful as you'd expect anything from Anna Maria Horner to be, full of her gorgeous fabrics being used to create gorgeous items. There are a lot of useful projects to choose from so if you or someone you know is expecting I do recommend it. The pattern that immediately caught my eye was the adorable baby-in-the-hood jacket and I was thrilled to discover that I had the perfect fabrics already in my stash to coordinate with the Pac-Man fabric. Must be fate. That and a snow day off of work were all I needed to dig in and get started.


I love that baby clothes require so little fabric. Even this fully-lined jacket barely made a dent in my yardage. The instructions are very clear and, aside from a few blips where I had to re-pin due to my own misjudgment or misalignment, everything went as planned. It's just that it took me forever to sew. Maybe it's because it was my first experience with the pattern or maybe it's because I was extra careful since it's a gift, but after a full afternoon of sewing last Saturday I still had the last page of instructions left to complete. Fortunately by that point I was able to see it coming together, which was enough to convince me that my hard work would pay off and spur me on to finish yesterday.

The pattern is really a clever one with all of the seams neatly tucked away. I could have used more illustrations and diagrams but the written instructions are clear enough that, once I forced myself to read them thoroughly, it was easy to figure out what to do. The only thing I might do differently next time is make the extra effort to switch out threads and bobbins so there's no contrast stitching. I'm confident enough in my ability to sew straight that I lazily used black thread everywhere but think I'd prefer the more invisible look of color coordinated thread better.


Still, as proud as I am of the end result I'm not sure I'll be repeating this performance for the other two cousins. I'm thinking of finding something a little less time-consuming to make for them, but I'll be sure to make it with just as much love. Although this jacket is so darn cute!


Photobucket

Saturday, January 29, 2011

A Photo A Day [Days 152 & 153]

This week's theme is hope. For some this is the only source of hope in life.


Finally finished the sewing project I started last weekend. Here I am putting the finishing touches on it. I should have a full blog post about it up tomorrow.

Thursday, January 27, 2011

A Photo A Day [Days 150 & 151]

A random filler pic of my kitty, Punky:


This week's theme, which I've been avoiding for most of the week, is "hope." I woke up this morning hoping the sun that's peeking out would be enough to melt all of that evil snow away so I wouldn't have to shovel. Alas, it was not to be. Manual labor was all that would shift the snow.

Tuesday, January 25, 2011

A Photo A Day [Days 148 & 149]

This week's official theme is "hope." Here's what I think of that theme right about now:

Day 148


For today's photo I abandoned hope and sought out an alternate theme to guide me. This one fits the bill for The Daily Shoot's theme: "make a photograph today that illustrates attraction."

Day 149 - Like a moth to a flame


Monday, January 24, 2011

Thin Mint Cupcakes


While I'm sure Thin Mint cupcake recipes have been out there on the internet for years I'm going to pretend I'm clever in coming up with my own version. For that reason, I didn't even bother Googling the subject for fear that my own creativity would be tainted by others' ideas. So if this has already been done I apologize for the repeat recipe. If it hasn't you can applaud me for my genius. :)

Girl Scout Cookie season is in full swing and I am both blessed and cursed to have my very own troop leader/cookie pusher on staff at work. My co-worker nicely brings in cases of cookies on the very first day of the sale and keeps restocking her supply until the very last day. As a result, I've got brightly colored boxes of all of Thin Mints, Caramel deLites, and Tagalongs/Peanut Butter Patties tantalizing me from across the room. Since I bake so much I'm usually able to resist going hog wild but I will buy a box of each of my favorites. While I love the flavors I'm always disappointed by how artificial and preservative-laden they taste when compared to freshly baked goods. One box of each is usually enough to tide me over until the following year.

Oddly, while I like chocolate and mint I don't get as excited about Thin Mints as most cookie customers seem to be. If they sold smaller portions I'd be happy with half a sleeve and then calling it quits for the year. But find a way to add cake and frosting to the mix and I'm game. Inspired by my Oreo truffle cupcakes I got to brainstorming how to incorporate Thin Mints into a cupcake and came up with a decadent, Thin Mint-laden creation.

As with the Oreo cupcakes, I lined the bottom of each cupcake with a cookie and whipped up a cream cheese cookie filling, only instead of Oreos I used Thin Mints. Paired with moist chocolate cake and topped with a a dollop of melted Andes mints and mint buttercream frosting the experience is like eating an overgrown Thin Mint. Mmmmm! Fortunately, nutritional information is not available so you don't have to feel guilty when you eat more than the suggested portion size as I always do with Girl Scout Cookies. There isn't a thing I'd change about these cupcakes and I have a feeling I'll be tempted to make then again this time next year.


Thin Mint Filling
Recipe adapted from Inside BruCrew Life

26 Thin Mint cookies, finely crushed (I used a food processor)
4 1/2 ounces cream cheese, softened

Blend crushed Thin Mints and cream cheese until fully mixed. Shape into 1" balls, place on a baking sheet, and refrigerate while making the batter.

Chocolate Cupcakes
Recipe adapted from Family, Stamping and Food

24 Thin Mint Cookies
2 cups flour
1 cup cocoa powder
1 1/2 teaspoon baking powder
1 1/2 teaspoon baking soda
1/4 teaspoon salt
1 3/4 cups sugar
1/2 cup melted butter, cooled
2 eggs
1 cup milk
2 1/2 ounces Andes Creme de Menthe baking chips
1 tablespoon heavy cream

1) Preheat oven to 350 F. Line 24 cupcake wells with paper liners. Place a Thin Mint cookie in the bottom of each liner.
2) Combine flour, cocoa, baking powder, baking soda, and salt in a bowl. Set aside.
3) Beat sugar and melted butter together on medium speed until well combined.
4) Add eggs and beat to combine.
5) Beginning with the flour mixture, add flour and milk alternately with three additions of flour and two additions of milk, beginning and ending with flour. Beat until just combined.
6) Fill cupcake liners 1/3 full with batter. Place Thin Mint truffle in the center of each and top with more batter until 2/3 full. Bake in preheated oven for 19-26 minutes or until tops of cupcakes spring back when lightly touched.
7) Cool in pan on rack for ten minutes, then remove from pan and transfer to a wire rack to cool completely.
8) While cupcakes are still warm, melt Andes baking chips and heavy cream in a saucepan over low heat until smooth. Spread a thin layer of chocolate on top of each cupcake.

Mint Buttercream
12 tablespoons unsalted butter, at room temperature
3 cups powdered sugar
3 tablespoons heavy cream
1/4 teaspoon peppermint oil
Green food coloring (optional)

1) In a large mixing bowl, cream butter for 45-60 seconds.
2) Add powdered sugar and beat until the mixture comes together.
3) Scrape down the sides of the bowl and add heavy cream, peppermint oil, and food coloring (if desired). Beat until combined and then beat an additional 45 seconds. If necessary, add more powdered sugar for desired consistency.


Photobucket